Monday, November 14, 2011

HowTo: Pretend you are working (While Text Browsing)

Commandline Web Browser (Just like lynx) using VbScript and IE API.

About the code: The code below will use the Internet Explorer API to load the top 20 stories from google news and choosing one of the article will load the document html of the target URL for you to be able to read news from your DOS command line. Best way to look like you are still working on a code while actually reading news without opening any web browsers :p

Requirements: IE 6++

Code Snippet:

Sub Loadnews()
Dim arrTestArray()
Dim urlSelect
intSize = 0
Dim rInterval:rInterval=60
Dim sTime:sTime = Now
Set ie = CreateObject("InternetExplorer.Application")
with ie
.visible = 0
.navigate "http://news.google.com/"
WScript.StdOut.Write vbcrlf & vbtab & "Loading Top Stories for @ " & Now
while .busy
WScript.StdOut.Write "."
WScript.Sleep 1000
wend
WScript.Echo vbcrlf & vbtab & "elapsed : " & datediff("s",sTime,Now) & " secs"
WScript.Echo vbtab & "next refresh: " & dateadd("s",rInterval,Now) & " secs" & vbcrlf
dim ctr:ctr=1
Set newsTitle = .Document.getElementsByTagName("a")
For each xTag in newsTitle
If instr(xTag.InnerHTML,"titletext") >0 then
WScript.Echo vbcrlf & vbtab & ctr & ". " & xTag.InnerText & _
"..." & vbcrlf & vbTab & "[" & xTag & "]"
ctr = ctr + 1
ReDim Preserve arrTestArray(intSize)
arrTestArray(intSize) = xTag
intSize = intSize + 1
If ctr >20 Then Exit For
End If
Next
end with
ie.quit
Set ie = nothing
Dim sleepctr:sleepctr=1
WScript.StdOut.Write vbcrlf & vbtab & "Choose an article #: "

urlSelect = WScript.StdIn.ReadLine
Set ie = CreateObject("InternetExplorer.Application")
Dim tgt:tgt=arrTestArray(urlSelect-1)
with ie
.navigate tgt
WScript.StdOut.Write vbcrlf & vbtab & "Loading [URL]..." & arrTestArray(urlSelect-1)
while .busy
WScript.StdOut.Write "."
WScript.Sleep 1000
wend
WScript.Echo .Document.Body.InnerText
end with
WScript.StdOut.Write vbcrlf & vbtab & "Press any key to continue..."
jcontinue = WScript.StdIn.ReadLine

End Sub


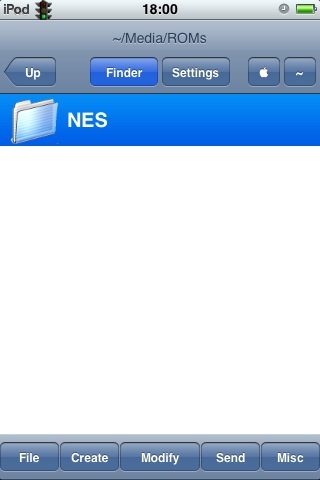
Screen grab:


If at first you fail, call it version 1.0

Tuesday, May 10, 2011

How can someone so beautiful be so angry?

Have you ever met someone so beautiful... yet so angry?


They are common nowadays... you can't seem to figure out the root of their anger....
Everyone has issues... who doesn't?
If you think you have bigger issues... there will always be someone out there with bigger dilemma...
It's just a matter of squaring it...

I'm blogging again... I must be bored.

After a decade of stfu'd attitude and spontaneous random life turning events...

I look back... what do I see? blurred vision... which is good as I would not want to look back... I just wanna keep moving forward... without hesitation...

Few questions that bogged me and pushed me to blog again... hoping someone from somewhere will somehow comment on my stupidity...

How do you prove your existence?
If you are in the memory of others, whether the past or present...

How do you know how far you've gone?
When you look back and could not find the lines that divides the horizon...
no glimpse of light nor shadow from the past...

How do you know if you've had too many?
When everyone starts ignoring your whining...

Why so many how's?

Well, there are so many hows I want to learn now that I'm back... hopefully in time I could make something out of it...

Hopefully this is more productive than bein' a couch potato watching reruns and the same movies over and over again...

What could I make out of all of this?

Digital blah blah's...


Tuesday, December 28, 2010

Gingerbread ported on N900

Amplify’d from www.hardwarezone.com


Android Gingerbread 2.3 Ported to Nokia N900


And the hackers have done it again. This time, Google's Gingerbread makes its way onto the Nokia N900, a device that was already running on the Linux-based Maemo OS. What makes this port even more impressive is the fact that the OS is running quite smoothly on the N900. Typically, you don't see that happening when another OS not built for the device is ported over.


Engadget - Running Android on the Nokia N900 has been an ongoing theme for the better part of the past year -- and with hardware designed from the ground up to be both hackable and high-end, we'd expect no less. Indeed, Android 2.3 is the latest victim of an N900 sneak attack, and impressively, core components like messaging already seem to be working -- likely thanks to the fact that hackers had already gotten pre-2.3 builds rock solid.


Now, wouldn't it be great if the Android OS was ported to the Nokia N8? Perhaps, that would have solved a whole lot of performance issues with Nokia's flagship model. Read more about the Android 2.3 port onto the Nokia N900 over here.


Read more at www.hardwarezone.com
 

Tuesday, July 15, 2008

HowTo: Enumerate Scheduled Tasks (Using SCHTASKS.EXE)

I cooked up a script to query the scheduled jobs on remote servers and pipe the output to a CSV file and utilize ADODB to query, populate an HTML template and use mailsend.exe to attach the HTML and send an email notification.

Below are the common parameters using SCHTASKS /Query to enumerate the scheduled jobs which will be the back bone of the script.

SCHTASKS /Query [/S system [/U username [/P password]]] [/FO format]         
    [/NH] [/V] [/?]                                                          
Description:                                                                 
    Enables an administrator to display the scheduled tasks on the           
    local or remote system.                                                  
Parameter List:                                                              
    /S        system            -          Specifies the remote system to connect to.      
    /U       username      -          Specifies the user context under which the command should execute.               
    /P       password       -          Specifies the password for the user context.                                   
    /FO    format             -          Specifies the output format to be displayed. Valid values: TABLE, LIST, CSV.      
    /NH                              -          Specifies that the column header should not be displayed in the output.                     
                                                       Valid only for TABLE and CSV formats.           
    /V                                 -           Specifies additional output to be displayed.                                      
    /?                                  -           Displays this help/usage.                       
Examples:                                                                    
    SCHTASKS /Query                                                          
    SCHTASKS /Query /?                                                       
    SCHTASKS /Query /S system /U user /P password                            
    SCHTASKS /Query /FO LIST /V /S system /U user /P password                
    SCHTASKS /Query /FO TABLE /NH /V
                 

Actual SCHTASKS command line executed from the script:

Schtasks.exe /QUERY /S %SERVERNAME% /FO CSV /NH /V > OutputFile.CSV

Actual Mailsend command line executed from the script:

Mailsend.exe -sub %Subject%  -v < %Template% -cs "ISO-8859-1" -a "%Attachment%,text/html,i"

-sub "Mail Subject"

-v Verbose Mode

< %Template%

       Template File Contains the following:

       1st line :  SMTP Host

       2nd line: Domain

       3rd line: Sender's Email Address

       4th Line: Recipient's Email Address

-cs character set   - for text/plain attachments (default is us-ascii)

-a file,mime_type  - attach this file

CODE SNIPPET:

Function GetTasks()
    Set oShell = WScript.CreateObject ("WSCript.shell")

    Set objShell = CreateObject("WScript.Shell")
    Set fso = CreateObject("Scripting.FileSystemObject")
    workfile = "OutputFile.csv"

    oShell.run "cmd /c schtasks /QUERY /S %SERVERNAME% /FO CSV /NH /V > "& workfile,0,true

   Set objConnection = CreateObject("ADODB.Connection")
   Set objRecordSet = CreateObject("ADODB.Recordset")

   strPathtoTextFile = "%PATHtoCSV%"

objConnection.Open "Provider=Microsoft.Jet.OLEDB.4.0;" & _
"Data Source=" & strPathtoTextFile & ";" & _
     "Extended Properties=""text;HDR=YES;FMT=Delimited"""

      strFile = "OutputFile.csv"

  objRecordset.Open "Select * FROM " & strFile , _
  objConnection, adOpenStatic, adLockOptimistic, adCmdText

Do Until objRecordset.EOF 

'If the Last Result of the Job <> 0 then get the job details and write it to the HTML Template

If objRecordset.Fields.Item("Last Result") <> 0 and objRecordset.Fields.Item("Next Run Time") <> "Disabled" and objRecordset.Fields.Item("TaskName") <> "cluster_info" Then
                        WSCript.Echo objRecordset.Fields.Item("HostName") & " | " & _
                         objRecordset.Fields.Item("TaskName")  & " | " & _                        
                         objRecordset.Fields.Item("Last Result") & " | " & _
                         objRecordset.Fields.Item("Next Run Time") & " | " & _
                         objRecordset.Fields.Item("Last Run Time") & " | " & _
                         objRecordset.Fields.Item("Run As User") & " | " & _
                         objRecordset.Fields.Item("Schedule") & " | " & _
                         objRecordset.Fields.Item("Task To Run")
   CreateMail objRecordset.Fields.Item("HostName"), objRecordset.Fields.Item("TaskName"), objRecordset.Fields.Item("Last Result"), objRecordset.Fields.Item("Last Run Time"), objRecordset.Fields.Item("Next Run Time"), objRecordset.Fields.Item("Task To Run"), objRecordset.Fields.Item("Run As User"), objRecordset.Fields.Item("Schedule"), mailfile                    
  End If  
      objRecordset.MoveNext
Loop

    oShell.Run "cmd /c DEL /Q " & workfile,0
    Set oShell = Nothing
End Function

Saturday, May 24, 2008

HowTo: (OSXp) Turn your XP to OSX

I got tired of the boring XP graphics so i worked on transforming my machine to OSX style desktop.


What you need:
1. Download and install Rocket Dock
    1.1 Configure the Dock and Icon Settings
    1.2 Set to Run on startup
2. Hide the XP taskbar (You can set it  to auto hide and lock)
3. Disable the Desktop
     3.1 Browse the regkey:  HKEY_CURRENT_USER\Software\Microsoft\Windows\CurrentVersion\Policies\Explorer\NoDesktop (Create the key if not found - DWORD) and set the value to 1
     3.2 Log off and relogin.

Optional:
Get an OSX wallpaper, install Safari and iTunes for more OSX feel!

Sample Snapshots of my new OSXp:


If at first you fail, call it version 1.0

Thursday, April 10, 2008

PimPod2DaMax

Just to share my latest setup, as promised!

Note: No Customize or Summerboard themes were used for this Mod. These are just all simple icon replacements using iPhone Browser. (Read my previous blogs for instructions)

Home Screen (Transparent Dock) with Kat Von D:

snap_012731

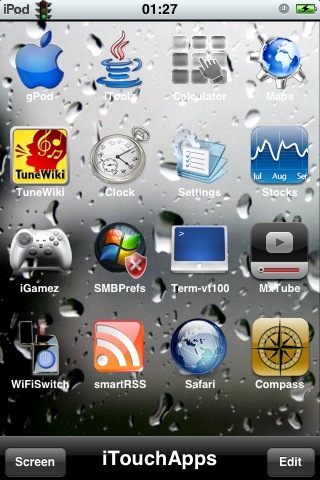
iTouchApps (Grouped by Category.App), activated by the first Icon on the Dock:

snap_012749

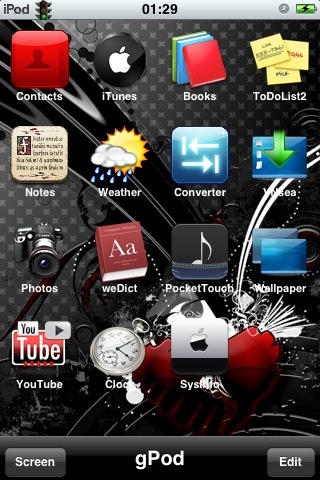
gPod (Grouped by Category.App), activated by gPod icon under iTouchApps:

snap_012907

iGamez (Grouped by Category.App), activated by the iGamez under iTouchApps:

snap_012803

iToolz (Grouped by Category.App), activated by the iToolz icon under iTouchApps:

snap_012831

Swipe to scroll to the next collection in iToolz category:

snap_012837

Pimped Weather Theme. Ain't using customize or summerboard, just replaced the default background via iPhone Browser (",)

snap_012930

Special thanks to the creators of Punisher, Bright Acrylic, Vista Ultimate, Divinity Themes for the icons and to Designer Set Customize Themes for the background images on Weather App and to Wallpaper.App and wallpaper contributors (if you install Wallpaper.App, please share your wallpaper, it's better to give than to receive) for the Categories background images and finally to the creator of ScreenShot.App! (",)


NES Emulator on iPod Touch

NES_icon

1. Using iGopher, create the local script on your PC and Export them to your iPod.

2. Launch Installer.App and install the NES emulator.

3. Restart your iPod.

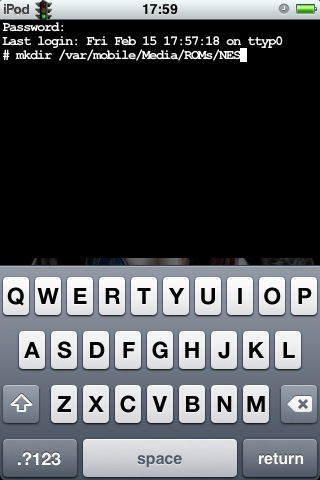
4. Create the NES folder in /var/mobile/Media/ROMS/NES. You can use any of the following:

a. SSH

b. Term VT100

snap_175907

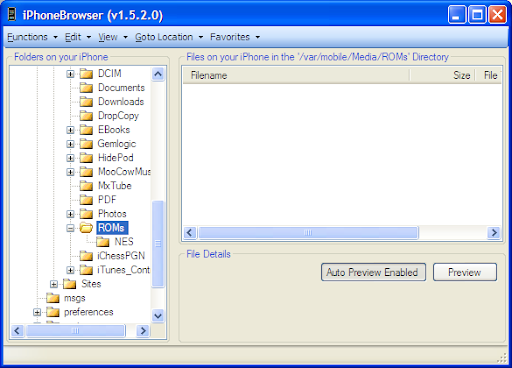
c. iPhone Browser

ROMs

d. MobileFind.App \ Find.App

snap_180007

5. Upload the ROMs in the folder that you've just created. (Using any of the following method above)

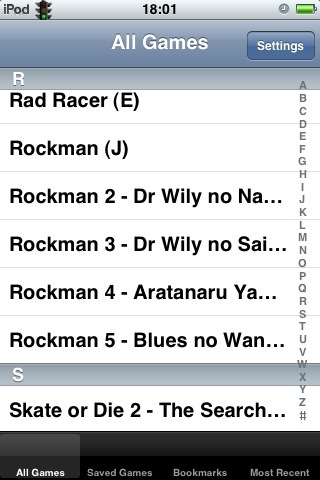
6. Launch NES.App, browse your ROMs and...

snap_180145

7. Enjoy the nostalgic games! Oh yeah, tilt to play in wide screen mode!

Normal Mode (Full Screen OFF):

snap_180209

Wide Screen Mode (Full Screen OFF):

snap_180219

Note: NES ROMs are Copyrighted! Do the right thing!

Wednesday, April 09, 2008

Pimp my iPod using iPhone Browser (USB Mod)


It's been a while since I posted again, guess I was too busy with my iPod...

Thanks to iPhone Browser, now who needs WiFi, SSH, Customize, Summerboard and Installer to install apps and fully modify your Pod?!?

You've got a USB cable, then you can do it all...

First download the iPhone Browser (Windows), install it, plug your iPod (you don't even need to run iTunes to have the Pod detected by the browser). 


Then browse the content of your iPod, drag files in to the GUI browser to transfer files to your iPod. Removal of files from the iPod is safe (iPhone Browser will back up the files in your local HDD before deletion... COOL)!

Replace all the default icons from /Application/AppName.App/icon.png with whatever you want. You can backup your current Summerboard Themes Icons by copying out /var/mobile/Library/Summerboard/Themes/Theme_Name_Folder.... so you can use any icons from any themes on your Pod (mix and match!).

To install the Application, use iGopher (instructions from my previous post) to download the packages to your PC, then unpack them to your iPod using iPhone Browser! Simple!

I've got PSX4All installed with NBA Live 2003 ROM, NES Emulator with tons of ROMs as well... getting a bit lazy to post the screen shots and additional instructions for the emulator installation and config... will do it next time... watch out for it!

If at first you fail, call it version 1.0

Wednesday, March 26, 2008

iPod Touch Full Mod (ZiPhone and iGopher)


Just want to share setup (",)

I have jailbroken my iPod Touch 8GB with ZiPhone and have restored to 1.1.4 Firmware due to technical problems, errr... more of a user fault...

Errors Committed:
1. Changed the default root password, result: Springboard Infinite Loop!

2. Installed Poof and accidentally hidden all Icons, result: Luckily I have BossPrefs installed and set "SSH always on reboot". Had to SSH to my gPod and

launch Categories.app (requires unix skills here ={D).

Now I've got it setup that it can pass as a phone and unmatched as a workstation.

Note: If you're a new user of iPhone\iPod and thinking of jailbreaking it, you don't have to sweat anymore. Follow the prodigal son's steps for the easiest

MOD!

1. Upgrade your Pod to 1.1.4 (MailApp, StocksApp, Wiggle)

2. Install ZiPhone and connect your Pod to PC with iTunes (atleast v7) running.

3. Use the jailbreak option, wait for the entire process to complete and it will reboot automatically. After the reboot, Installer.App will be available.

This will include all the community sources available in the default package. You will need WiFi access to refresh the sources and install the apps. (But

wait... just keep on reading and you will learn that you do not need WiFi access to install Apps on your Pod ={D , just keep reading...)

4. Launch Installer.App, Go straight to Sources and touch Refresh to update the packages, this might take a while, so go for a fag or coffee break... Once

the refresh is completed, touch Install and you may start browsing for packages to install 3rd party apps. Make sure to check the updates page, it might

require you to update Installer.App... If you find an update package, install the update and restart Installer.App... Then

5. Install the packages in this order (Don't skip anything, trust me
you need all of them):
-BSD Subsystem 2.1
-BSD Subsystem 2.0 Termfix,

-SUID Libfix
-Community Sources
-OpenSSH
-Term-VT100
-BoosPrefs (Set SSH on Reboot and Wifi On)
-BossTool

Important Note, Installer.App is unable to detect the larger partition in the Pod... Yeah there are 2 partitions in your Pod...
Smaller Partition has 300MB (allocated for the OS and Apps) and the rest are allocated to the 2nd partition (allocated for Pics\Vids\Music..etc)...
If you keep installing applications, you will run out of disk space on the smaller partition and Installer.App will no longer allow you to install...

Luckily, at this point, you already have BossTool installed in your Pod... you can use it to move the Apps\Ringtone\Fonts to the bigger partition...
Technically, it's Nix MV and LN for dummies... meaning... the tool will move the files to the bigger partition and create a link to the folder...
Read on More Info in BossTool and be very careful, if the first files you moved (Fonts) did not make any file size increase in smaller partition...
Do not proceed in moving the apps... skip this and move on to the next step...

Or If Once that's done with no errors...

This part will tweak your Pod to create links and folders in the larger partion... WHY?!?
So that all the installations will be placed in the larger partition... MEANING?!?
YOU CAN INSTALL AS MUCH 3rd PARTY APPS AS YOU WANT!!! upto FULL 7GB... LOL


You can SSH into Your Ipod using (password is "alpine", first login takes 30-45 sec = ignore 15sec msg) or Launch Terminal VT100
1. Go to /private/var/root/
2. Create a new folder called "Media" (without "")
3. Run the following commands, hitting enter after each line:
cp -R /private/var/root/Media /private/var/mobile/
rm -r /private/var/root/Media
ln -s /private/var/mobile/Media /private/var/root/Media
cp -R /private/var/root/Library /private/var/mobile/
rm -r /private/var/root/Library
ln -s /private/var/mobile/Library /private/var/root/Library

Restart your Pod.

Now you can install till your Pod is full of Games\Apps\Utilities and such using Installer.App... Ooops.. You need WiFi to download and install packages...

Ahhhhh... That sucks...

Don't fret on it!!!

As promised... You can install packages without WiFi... Yeah you can via USB cable!!!
Catch? You still need Internet access on your PC... but trust me this is so much easier than downloading and installing apps using WiFi and very slow net...

New Steps:
1. Install the latest version of iGopher on your PC (you can get em here: http://code.google.com/p/igopher/)
2. Extract it in any folder (Alpha version doesn't have any installer yet... and yeah read on the requirements... .Net runtime and such)
3. Launch Gopher.exe (your iTunes running and Pod plugged in)
It will not be able to detect the Pod yet as the Installer.App do not have access to system files...
Fix is here (well this will be the last time you will need WiFi to install Apps... promise!!!)
3.1 Add http://i.unlock.no in your sources (Launch Installer.App, touch sources, touch edit, touch add then keyin the URL)
3.2 Refresh your Sources then browse under install then search for "ZiPhone iBrickr Fix", you need to restart ur Pod after installing it.
3.3 iGopher should have already detected your Pod
3.4 You may need to update the resources in Gopher (in the folder where you extracted iGopher, open AllSources.txt and update it with known Repos)
3.5 After refreshing the Sources in iGopher. you can browse for all Apps and installed as much to your heart's desire...

Enjoy It!!!

If you need help, mail me: Smooth Fingerz

Check out screen caps of my iPod Touch setup.

If at first you fail, call it version 1.0

Tuesday, March 18, 2008

If at first you fail, call it version 1.0
ro

Thursday, February 14, 2008

Outlook: Move Items to Folder (with GUI folder list and not inputbox)

I was searching for a Macro online for Outlook mail items moved to different folders.

Have seen few codes that performs the same but with this code I used the GUI folder listing instead of prompting for an inputbox to avoid errors as most users are not aware of the Folder paths.

I submitted the code to OutlookCodeDotCom: Moving mail items to specified folder

It has 30++ downloads so far... not bad!

  1. Sub MoveMailToFolders()
  2. Dim objNS As Outlook.NameSpace
  3. Dim MyFolder As Outlook.MAPIFolder
  4. Dim objItem As Outlook.MailItem
  5. Dim ctr As Integer
  6. On Error Resume Next
  7. ctr = 0
  8. Set objNS = Application.GetNamespace("MAPI")
  9. Set MyFolder = objNS.PickFolder
  10. MsgBox "The selected mail item(s) will be moved to: " & vbCrLf & vbCrLf & _
  11. "Folder Path: " & MyFolder.FolderPath & vbCrLf & _
  12. "Folder Name: " & MyFolder.Name _
  13. , vbOKOnly + vbInformation, "Outlook Help"
  14. For Each objItem In Application.ActiveExplorer.Selection
  15. If MyFolder.DefaultItemType = olMailItem Then
  16. If objItem.Class = olMail Then
  17. ctr = ctr + 1
  18. objItem.Move MyFolder
  19. End If
  20. End If
  21. Next
  22. MsgBox "Moved: " & ctr & " mail item(s) to: " & MyFolder.Name, vbInformation, "Outlook Help"
  23. Set objNS = Nothing
  24. Set MyFolder = Nothing
  25. End Sub


Then using the Customize option on the toolbar, you can create a button for the Macro and assign a shortcut key to it!


If at first you fail, call it version 1.0
Wednesday, January 30, 2008

Latest Project: Server Monitoring Using WMI

It was a while since my last post. Year ender is quite busy and the new year was as much.

I've been working on a latest project for our team. I set up a monitoring server running WMI scripts against remote servers in intervals of 2 or 30mins (depending on the frequency of data required).

Below are few simple snippets I used in to collect remote data and pump it in an html template and send it via email to the team (if ever performance thresholds were exceeded).

Code Snippets:

  1. Sub DisplayErrorInfo
  2. WScript.Echo "Error: : " & Err
  3. WScript.Echo "Error (hex) : &H" & Hex(Err)
  4. WScript.Echo "Source : " & Err.Source
  5. WScript.Echo "Description : " & Err.Description
  6. Err.Clear
  7. End Sub

#1 Bytes Converter Snippet (
One of my favorite snippet, pretty handy!)

  1. Function SetBytes(Bytes,fKB)
  2. If fKB=True then Bytes = Bytes * 1024
  3. If Bytes >= 1073741824 Then
  4. SetBytes = FormatNumber((Bytes / 1024 / 1024 / 1024),2,,-1,-1) & " GB"
  5. ElseIf Bytes >= 1048576 Then
  6. SetBytes = FormatNumber((Bytes / 1024 / 1024),2,,-1,-1) & " MB"
  7. ElseIf Bytes >= 1024 Then
  8. SetBytes = FormatNumber((Bytes / 1024),2,,-1,-1) & " KB"
  9. ElseIf Bytes <>
  10. SetBytes = Bytes & " Bytes"
  11. End If
  12. End Function

#2 Get Available Memory on the server

  1. strComputer = "."
  2. Set objWMIService = GetObject("winmgmts:\\" & strComputer & "\root\cimv2")
  3. Set colItems = objWMIService.ExecQuery _
  4. ("Select * From Win32_PerfRawData_PerfOS_Memory")
  5. For Each objItem in colItems
  6. intValue = objItem.AvailableBytes
  7. Wscript.Echo "Available memory = " & SetBytes(intValue,false)
  8. Exit For
  9. Next

Note: This requires cooking. If you you have no idea how that works then just use AvailableMBytes instead.

#3 Get CPU Usage (%)

  1. Function GetCPUProcUsg(svr)
  2. c = 0
  3. strComputer = "."
  4. Set objWMIService = GetObject("winmgmts:\\" _
  5. & strComputer & "\root\cimv2:Win32_PerfRawData_PerfOS_Processor.Name='_Total'")
  6. If Err = 0 Then
  7. While (True)
  8. N1 = objWMIService.PercentProcessorTime
  9. D1 = objWMIService.TimeStamp_Sys100NS
  10. Wscript.Sleep(1000)
  11. Set objWMIService2 = GetObject("winmgmts:\\" _
  12. & strComputer & "\root\cimv2:Win32_PerfRawData_PerfOS_Processor.Name='_Total'")
  13. N2 = objWMIService2.PercentProcessorTime
  14. D2 = objWMIService2.TimeStamp_Sys100NS
  15. PercentProcessorTime = (1 - ((N2 - N1)/(D2-D1)))*100
  16. Wscript.Echo "Processor Usage: " & Round(PercentProcessorTime,2) & "%"
  17. GetCPUProcUsg = Round(PercentProcessorTime,2) & "%"
  18. Wend
  19. Else
  20. DisplayErrorInfo
  21. End If
  22. Set objWMIService = nothing
  23. Set objWMIService2 = nothing
  24. End Function

#4 Get Available Disk Space
  1. strComputer = "."
  2. strUser =
  3. strPass =
  4. Set objSWbemLocator = CreateObject("WbemScripting.SWbemLocator")
  5. Set oWMI = objSWbemLocator.ConnectServer(strComputer, "root\cimv2", strUser, strPass)
  6. Set colDisks = oWMI.InstancesOf("win32_PerfRawData_PerfDisk_LogicalDisk.Name")
  7. For Each objDisk in colDisks
  8. intBaseValue = objDisk.PercentFreeSpace_Base
  9. dblActualFreeSpace = (100 * objDisk.PercentFreeSpace) / intBaseValue
  10. Wscript.Echo objDisk.Name & Int(dblActualFreeSpace)
  11. Next


If at first you fail, call it version 1.0
Thursday, September 13, 2007

HowTo: Enum Citrix Server License using LMSTAT

Our PS4 server seems to fail to execute the license information scripts from Citrix.Com (Dependency on SDK).

So instead of relying on it, I decided to develop a script using LMSTAT and a short vb script to parse the output file and write it to a .CSV file for better viewing (Data Filtering and such...)

First I piped the result of lmstat -a to a text file then I used the script below to parse the contents then write it to a .CSV file

Code Snippet:

Parse the source file (lmstat output file): srcfile

  1. Sub GetData(srcfile)
  2. Set f = fso.GetFile(srcfile)
  3. Set ts = f.OpenAsTextStream(ForReading, TristateUseDefault)
  4. Do While ts.AtEndOfStream <> True
  5. readResults = Trim(UCase(ts.ReadLine))
  6. If InStr(readResults, "/27000") Then
  7. mps = split(readResults, Chr(32))
  8. msg = mps(1) & "," & mps(3) &amp; "," & mps(4) &amp;amp; "," & mps(5) & mps(6) & mps(8) &amp;amp; " " & mps(9) &amp;amp; " " & mps(10)
  9. WriteToCSV msg, license_out
  10. End If
  11. Loop
  12. End Sub

Write to CSV function: oCsv(Output File), msg(parsed ReadLine results)


  1. Function WriteToCSV(oCsv,msg)
  2. If Not fso.FileExists(oCsv) Then fso.CreateTextFile(oCsv)
  3. Set f = fso.GetFile(oCsv)
  4. Set ts = f.OpenAsTextStream(ForAppending, TristateUseDefault)
  5. ts.Write msg & vbCrlf
  6. msg = ""
  7. ts.Close
  8. End Function
If at first you fail, call it version 1.0
Wednesday, September 12, 2007

Event Log

Event Log Manipulations:

1. Reading the Event Log
2. Clearing the Event Log
3. Creating backup of the Event Log

Code Snippet #1:

  1. strComputer = "."
  2. Set objWMIService = GetObject("winmgmts:" _
  3. & "{impersonationLevel=impersonate}!\\" _
  4. & strComputer & "\root\cimv2")
  5. Set colLoggedEvents = objWMIService.ExecQuery _
  6. ("Select * from Win32_NTLogEvent " _
  7. & "Where Logfile = 'System'")
  8. For Each objEvent in colLoggedEvents
  9. Wscript.Echo "Category: " &amp; objEvent.Category & VBNewLine _
  10. &amp;amp; "Computer Name: " & objEvent.ComputerName & VBNewLine _
  11. & "Event Code: " & objEvent.EventCode & VBNewLine _
  12. & "Message: " & objEvent.Message & VBNewLine _
  13. & "Record Number: " & objEvent.RecordNumber & VBNewLine _
  14. & "Source Name: " & objEvent.SourceName & VBNewLine _
  15. & "Time Written: " & objEvent.TimeWritten & VBNewLine _
  16. &amp;amp; "Event Type: " & objEvent.Type & VBNewLine _
  17. & "User: " & objEvent.User
  18. Next


Code Snippet #2:

  1. strComputer = "."
  2. Set objWMIService = GetObject("winmgmts:" _
  3. & "{impersonationLevel=impersonate,(Backup)}!\\" & _
  4. strComputer & "\root\cimv2")
  5. Set colLogFiles = objWMIService.ExecQuery _
  6. ("Select * from Win32_NTEventLogFile " _
  7. & "Where LogFileName='Application'")
  8. For Each objLogfile in colLogFiles
  9. objLogFile.ClearEventLog()
  10. WScript.Echo "Cleared application event log file"
  11. Next

Code Snippet #3:


  1. strComputer = "."
  2. Set objWMIService = GetObject("winmgmts:" _
  3. & "{impersonationLevel=impersonate,(Backup)}!\\" & _
  4. strComputer & "\root\cimv2")
  5. Set colLogFiles = objWMIService.ExecQuery _
  6. ("Select * from Win32_NTEventLogFile " _
  7. & "Where LogFileName='Application'")
  8. For Each objLogfile in colLogFiles
  9. errBackupLog = objLogFile.BackupEventLog( _
  10. "c:\scripts\application.evt")
  11. WScript.Echo "File saved as c:\scripts\applications.evt"
  12. Next
If at first you fail, call it version 1.0
Friday, July 13, 2007

MFCOM: Farm Session Count

Another day of Citrix Administration, a simple MFCOM script to view Active Farm Sessions.

Code Snippet:

  1. Const cMetaFrameWinFarmObject = 1
  2. Const MFSessionStateActive = 1
  3. Set theFarm = CreateObject("MetaFrameCOM.MetaFrameFarm")
  4. theFarm.Initialize(cMetaFrameWinFarmObject)
  5. intSessionCount = 0
  6. intActiveCount = 0
  7. For Each oSession In theFarm.Sessions
  8. intSessionCount = intSessionCount + 1
  9. If (oSession.SessionState = MFSessionStateActive) and (oSession.SessionName <> "Console") Then
  10. intActiveCount = intActiveCount + 1
  11. WScript.Echo vbcrlf & "*****************************"
  12. WScript.Echo "User Name: " & oSession.UserName
  13. WScript.Echo "IP Address: " & oSession.ClientAddress
  14. WScript.Echo "Server: " & oSession.ServerName
  15. WScript.Echo "Application: " & oSession.AppName
  16. WScript.Echo "Logon Time: " & oSession.ConnectedTime
  17. End If
  18. Next
  19. WScript.Echo "Total Session Count = " & intSessionCount & vbcrlf & _
  20. "Active Session Count = " & intActiveCount


If at first you fail, call it version 1.0

MFCOM: Connection licenses and usage count

Yet Another Citrix Administrator Task, monitor the connection licenses and usage count in the farm...

Feel like a hill billy...

Code Snippet:

  1. Dim fso
  2. Set fso = CreateObject("Scripting.FileSystemObject")
  3. If not fso.FolderExists("c:\liclog" ) then
  4. Set MyFolder = fso.createFolder("c:\liclog" )
  5. else
  6. End if
  7. if not fso.FileExists("c:\liclog\licCount.log" ) then
  8. Set MyFile= fso.createTextFile("c:\liclog\licCount.log")
  9. MyFile.writeline "Date " & " Time " & "Lic Type " & "Used"
  10. MyFile.close
  11. else
  12. end if
  13. Const ForAppending = 8
  14. Set MyFile= fso.OpenTextFile("c:\liclog\licCount.log", ForAppending,True)
  15. Dim theFarm, aLicense
  16. Set theFarm = CreateObject("MetaFrameCOM.MetaFrameFarm")
  17. ' Initialize the farm object.
  18. theFarm.Initialize(MetaFrameWinFarmObject)
  19. For Each aLicense In theFarm.LicenseSets(MFLIcenseClassConnection)
  20. if aLicense.LicenseID = "0000000000000003" then
  21. MyFile.WriteLine date & "," & time & "," & aLicense.Name &amp;amp; "," & aLicense.pooledinuse("")
  22. else
  23. end if
  24. next
  25. MyFile.Close


If at first you fail, call it version 1.0

Monday, July 09, 2007

Merlin the great!

Imagine how amazed your users will be when they login to the domain and Merlin greets them...

You can call Merlin using Agent Control and make do the moves while you perform you login scripts in the background...

You can load information about the logged on user either using ADSI scripts or just by reading on the environment variable table...

Take note of the length of the messages or actions you throw at Merlin, you might need to make use of the Sleep method, otherwise the sentences or the animation will overlap...

Code Snippet:


  1. strAgentName = "Merlin"
  2. strAgentPath = "Msagent\Chars\" & strAgentName &amp;amp; ".acs"
  3. Set objAgent = CreateObject("Agent.Control.2")
  4. objAgent.Connected = True
  5. objAgent.Characters.Load strAgentName, strAgentPath
  6. Set merlin_d_great = objAgent.Characters.Character(strAgentName)
  7. With merlin_d_great
  8. .Show
  9. Set objRequest = .MoveTo(500,400)
  10. Set objRequest = .Play("Announce")
  11. Set objRequest = .Play("Explain")
  12. Set objRequest = .Speak("Hi ")
  13. Set objRequest = .Play("Read")
  14. wscript.sleep 2000
  15. Set objRequest = .Speak("Today is " & Now() & "...")
  16. Set objRequest = .Play("ReadContinued")
  17. wscript.sleep 2000
  18. Set objRequest = .Speak("and the time is " &amp; Time() & "...")
  19. wscript.sleep 2000
  20. Set objRequest = .Play("ReadReturn")
  21. wscript.sleep 2000
  22. Set objRequest = .MoveTo(750, 450)
  23. Set objRequest = .Play("Pleased")
  24. wscript.sleep 5000
  25. Set objRequest = .Speak("I will be back shortly...")
  26. wscript.sleep 5000
  27. Set objRequest = .Play("Wave")
  28. wscript.sleep 5000
  29. .Hide
  30. End With

Have a blast with Merlin, and oh... you can use other characters aswell...

If at first you fail, call it version 1.0
Radia Command Lines

There are few documents available on Radia troubleshooting and knowledgebase so I decided to post

Q. What is Radia?
A. Radia is Software Deployment\Management Solution (formerly Novadigm EDM\Radia) that was bought by HP.

Q. What is RCS?
A.

Q. What is RPM?
A.

Q. What is RPX\RPS?
A.

Q. What is RMS?
A.


  1. nvdkit objdump
  2. nvdkit.exe objdump zconfig.edm | FIND /I
  3. nvdkit eval nvd::init; set radexe "[exec $::NVDSYS/RADNTFYC.EXE RADCONCT.EXE mode=discovery]"
  4. nvdkit tpping -host
  5. nvdkit sync

  6. If at first you fail, call it version 1.0
    KD Memory.dmp debugging

    One of our Citrix server encountered a BSOD, luckily we had RSA and managed to hard reboot the server.

    I've gathered the memory dump to view the cause of BSOD and found the Symantec Antivirus has caused a module error on the NIC driver.

    We have then disabled the Network Drives in the File System Auto Protect and it had not experienced the same ever since.

    Did not find any help from Symantec regarding the root cause other than it's a known issue.

    Below are some steps that you could use for debbuging:

    1. Launch windbg passing it the location of the symbol files, the source files (i386 directory) and the dump file. Example: windbg -y dump\symbols -i SRC\i386 -z dump\Memory.dmp

    2. At the bottom of the Command window there is a kd> prompt.

    3. The commands are entered into that prompt: kd>!analyze -v

    4. Two things to look for in the results: the memory referenced and the FAULTING_IP

    5. The command: kd>lm - will produce a listing of modules and their memory location.

    6. Look to see which module's memory the memory referenced identified above falls in.

    7. That usually indicates the process that caused the crashed and will probably match the FAULTING_IP if listed.

    8. Also informative: kd>.reload –v

    If at first you fail, call it version 1.0